What You’ll Need
- Before you begin, make sure:
- Your products are published
- WooCommerce is installed and activated
- ProofWP is installed and activated
Step 1: Go to the Plugins section
From your WordPress dashboard, go to Plugins.
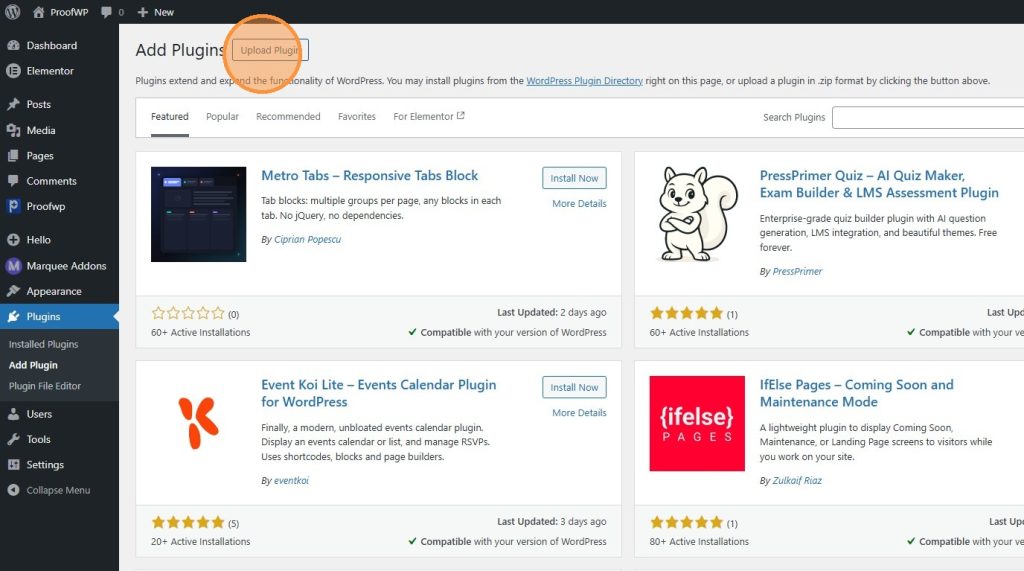
On the Plugins page, click Add Plugin.
Now either upload the ProofWP plugin file or search for it from the plugin library.
If you’ve purchased the Pro version of ProofWP, you’ve unlocked access to premium features, advanced review functionality, and modern display layouts. Follow the instructions below to install the Pro version and activate your license key.
Step 1.1: Pro installation Guideline – Upload a ZIP from Your Computer
- Log in to your account using our given credentials and Download the Latest version ProofWP Pro.
- Now Login to your wordpress dashboar and Go to Plugins → Add New Plugin.
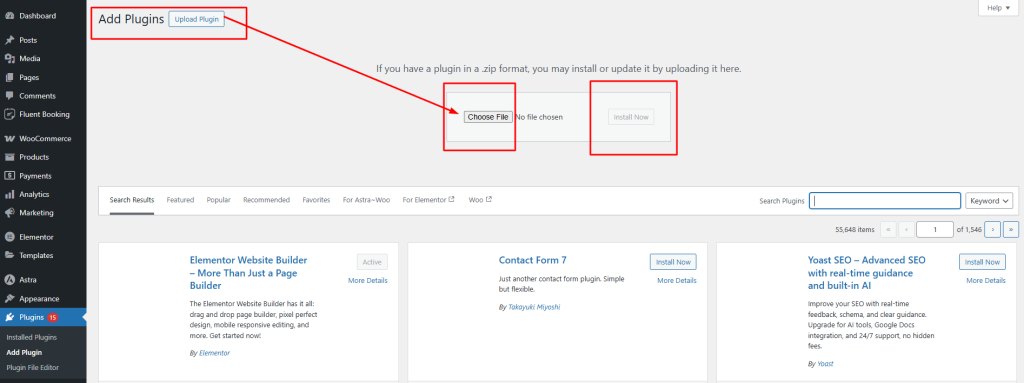
- Click Upload Plugin.
- Choose the download file “proofwp-pro.zip” (or provided ZIP) and click Install Now.
- Click Activate.
Step 1.2: Activate License Key
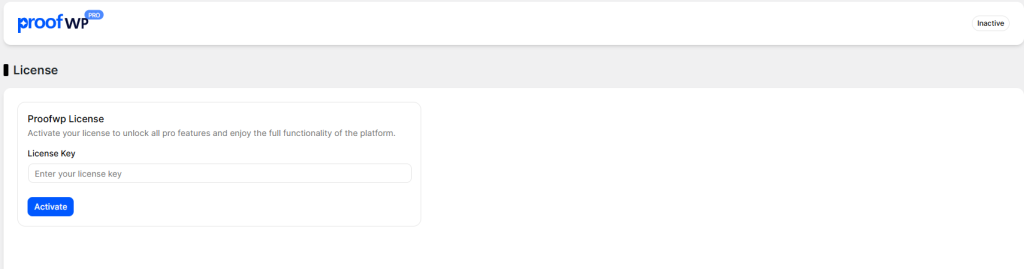
From the ProofWP menu, click the License sub-menu. Enter your license key(received after purchasing the product via email or copy from the CRM), then click Activate. Once activated, all Pro features will be unlocked.
If you are facing any issues with license activation, please contact us at [email protected].
After successfully activating your license, you can start adding videos and create your reels.
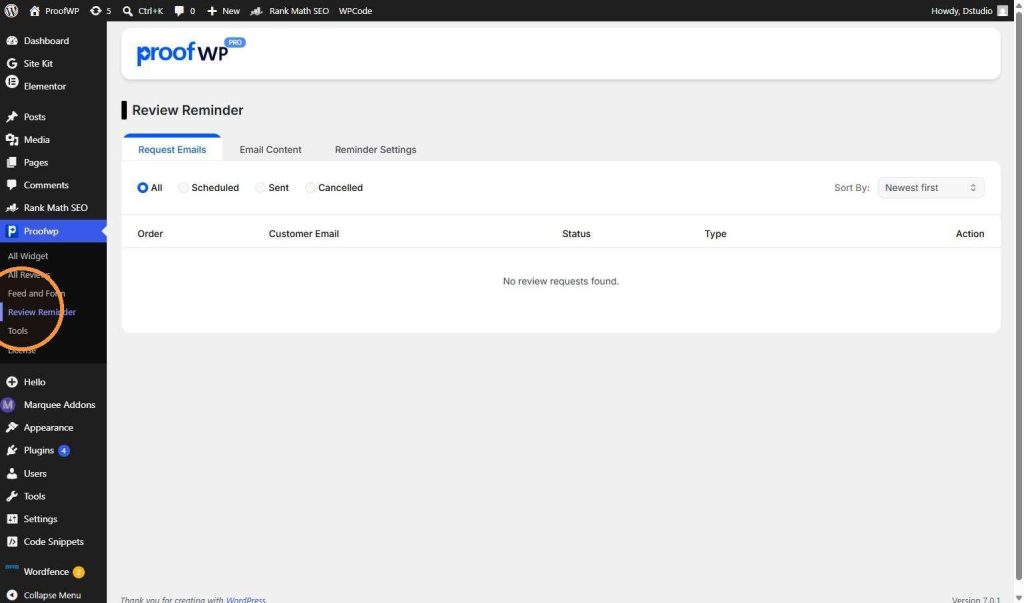
Click on Proofwp in the left menu of your WordPress dashboard, then click on Review Reminder. This takes you to the main page. Under the Request Emails tab, you can see a list of all your emails. It shows if they are Scheduled (waiting to send), Sent, or Cancelled.
Click on the Email Content tab. Open the First Review Request section. Here, you can type your Email subject and the Email content. You can use special tags like [customer_name] or [site_name] to automatically show the customer’s name and your shop’s name. You can also change the text on the button, like “Write a Review.” When you are finished, click Save. You can also click Send a test mail to see how it looks.
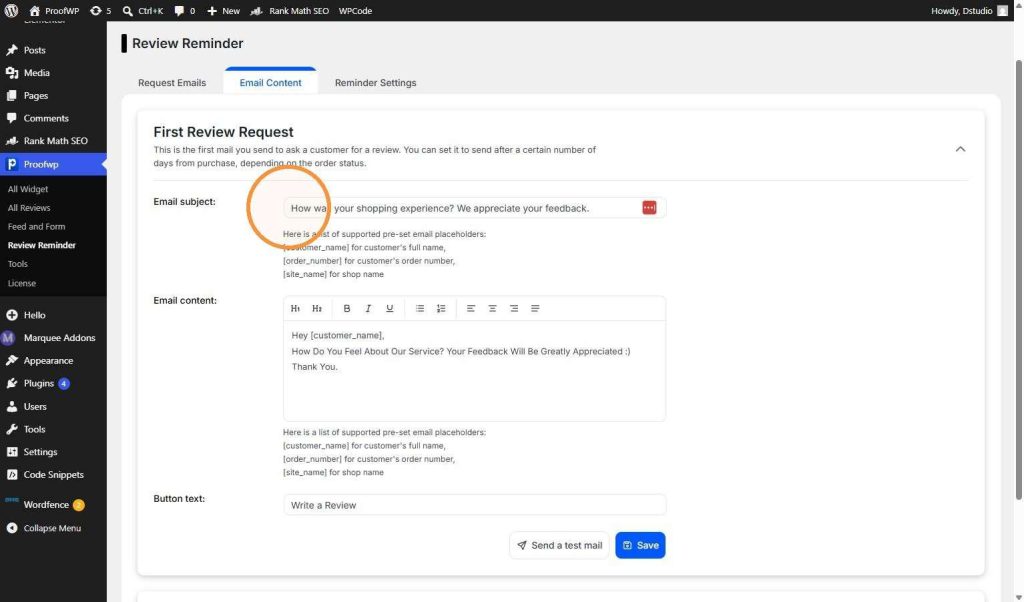
Scroll down on the same Email Content page to find the Follow up Review Request section. Just like the first email, you can write a new subject line and message for customers who did not leave a review yet. After you finish writing, click the blue Save button at the bottom.

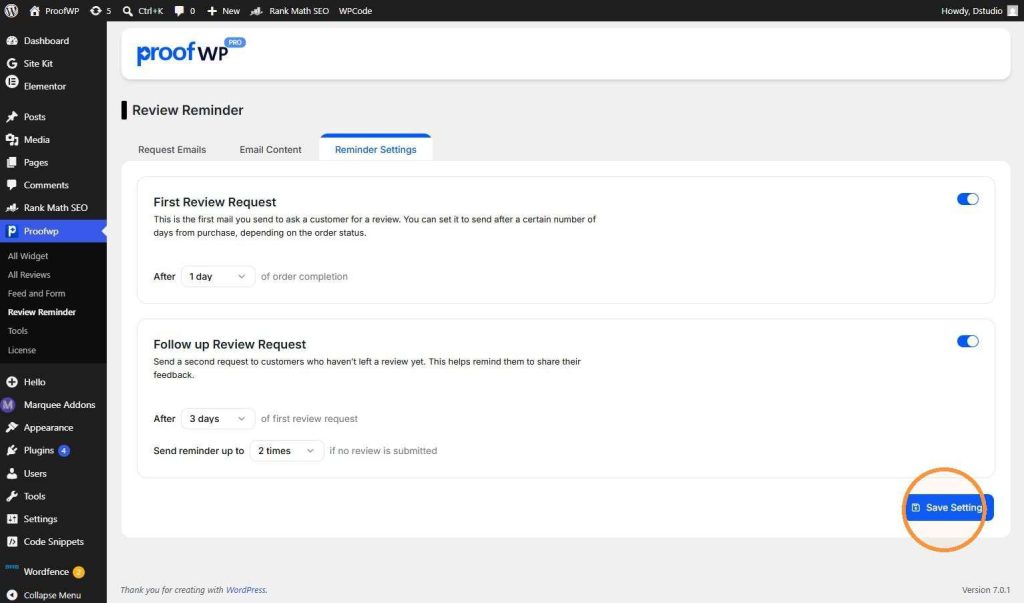
Click on the Reminder Settings tab. Use the blue switches on the right to turn the emails on or off. For the First Review Request, choose how many days to wait after a customer finishes their order (for example, After 1 day). For the Follow up Review Request, choose how many days to wait after the first email is sent.

In the Follow up Review Request section, look for the option that says Send reminder up to. Click the dropdown menu to choose how many times you want to send the reminder (from 1 time up to 5 times). The plugin will stop sending emails automatically as soon as the customer leaves a review.
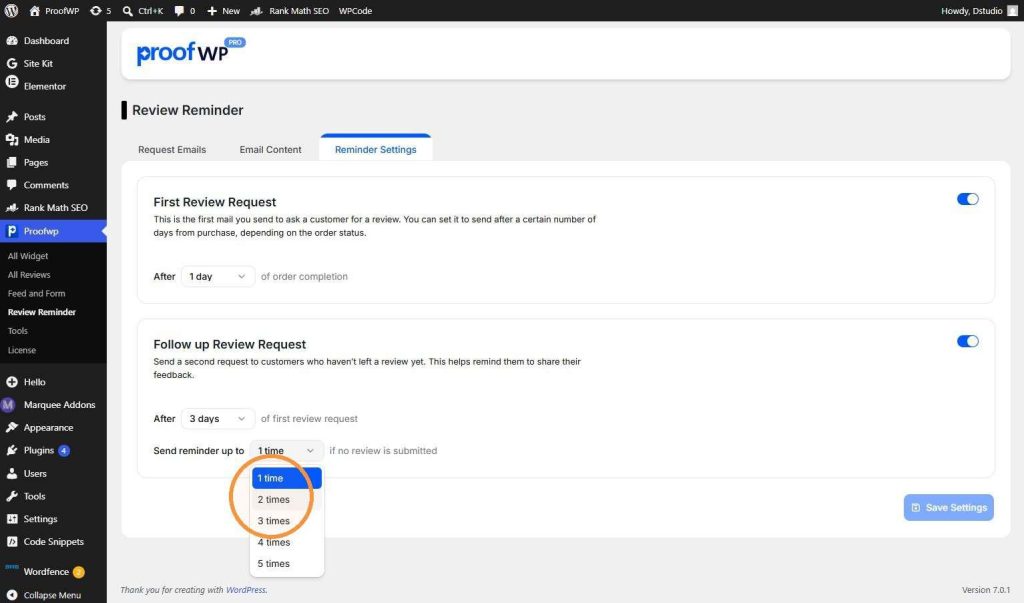
After you choose your timing and select how many times to send the email (for example, 2 times), click the blue Save Settings button at the bottom right. Now, your automatic review reminders are live and working!